TeamViewer เป็นโปรแกรมที่มีประโยชน์สำหรับการสนทนาทางวิดีโอและการควบคุมระยะไกลและเป็นตัวเลือกยอดนิยมในหมู่เกมเมอร์และความช่วยเหลือด้านไอทีระยะไกล อย่างไรก็ตามผู้ใช้หลายคนรายงานว่าพวกเขาไม่สามารถเชื่อมต่อได้ พวกเขาเห็นข้อความแสดงข้อผิดพลาดที่เป็นปัญหาที่ด้านล่างของหน้าจอถัดจากแสงสีแดง

มีวิธีการไม่กี่วิธีที่คุณสามารถใช้เพื่อแก้ไขปัญหาและเราขอแนะนำให้คุณตรวจสอบด้านล่าง โดยปกติแล้วจะค่อนข้างง่ายในการดำเนินการและสามารถแก้ไขปัญหาของคุณได้ในทันที!
อะไรเป็นสาเหตุของข้อผิดพลาด TeamViewer“ ไม่พร้อมตรวจสอบการเชื่อมต่อของคุณ” ใน Windows
ปัญหาเฉพาะนี้มีสาเหตุหลายประการและการระบุสาเหตุที่ถูกต้องอาจมีความสำคัญหากคุณไม่ต้องการลองใช้ทุกวิธีในรายการ สิ่งนี้จะนำคุณไปสู่แนวทางแก้ไขได้เร็วขึ้นและนั่นคือเหตุผลที่เราตัดสินใจสร้างรายการสาเหตุที่เป็นไปได้ทั้งหมดที่อยู่ด้านล่าง
- การตั้งค่าที่ไม่ถูกต้องในไฟล์ "โฮสต์" - ไฟล์ "โฮสต์" มีข้อมูลสำคัญเกี่ยวกับแอปที่เชื่อมต่อกับอินเทอร์เน็ตและเป็นไปได้ว่ารายการสำหรับ TeamViewer เสียหาย การลบรายการจะทำให้ Windows สร้างใหม่ดังนั้นลองแก้ไขปัญหา
- ปัญหาการป้องกันไวรัสหรือไฟร์วอลล์ - หากการเข้าถึงอินเทอร์เน็ตของ TeamViewer ถูกขัดขวางโดยไฟร์วอลล์หรือโปรแกรมป้องกันไวรัสที่คุณใช้งานอยู่ตรวจสอบให้แน่ใจว่าคุณได้พยายามยกเว้นสำหรับไฟล์ปฏิบัติการหลัก
- ปัญหา DNS และ Winsock - สามารถเปลี่ยนที่อยู่ DNS และสามารถรีเซ็ต Winsock ได้ สำหรับผู้ใช้หลายคนนี่คือทั้งหมดที่ใช้ในการแก้ไขปัญหาดังนั้นอย่าลืมลองใช้!
- การเชื่อมต่อ IPv6 - TeamViewer จะไม่ทำงานบน IPv6 ในบางครั้งดังนั้นอย่าลืมปิดการใช้งานเพื่อแก้ไขปัญหานี้ มันจะไม่เจ็บและอาจทำให้ TeamViewer กลับมา!
- อินเทอร์เฟซใหม่ของ TeamViewer - อินเทอร์เฟซผู้ใช้ไม่ใช่สิ่งที่ควรเกี่ยวข้องกับปัญหาการเชื่อมต่อ แต่เป็นกรณีของผู้ใช้ TeamViewer หลายคน การเปลี่ยนกลับไปใช้อินเทอร์เฟซเก่าได้รับการจัดการเพื่อแก้ไขปัญหาสำหรับพวกเขา
โซลูชันที่ 1: ลบ TeamViewer จากไฟล์โฮสต์
เป็นไปได้สูงว่ารายการ TeamViewer ในไฟล์ "โฮสต์" บนคอมพิวเตอร์ของคุณเสียหาย อาจแสดงที่อยู่และข้อมูลที่ไม่ถูกต้องและเราขอแนะนำให้คุณลบรายการดังกล่าว เมื่อคุณเปิดขึ้นมาใหม่รายการจะถูกสร้างขึ้นใหม่และหวังว่าปัญหาจะหยุดปรากฏ!
- ไปที่ตำแหน่งC >> Windows >> System32 >> Drivers >> Etcโดยไปที่มันหลังจากเปิด File Explorer ขั้นแรกให้คลิกพีซีเครื่องนี้หรือคอมพิวเตอร์ของฉันจากบานหน้าต่างด้านซ้ายเพื่อค้นหาและเปิดLocal Disk C ของคุณ
- หากคุณไม่เห็นโฟลเดอร์ Windows คุณอาจต้องเปิดตัวเลือกที่ช่วยให้คุณเห็นไฟล์และโฟลเดอร์ที่ซ่อน คลิกแท็บ " ดู " ในเมนูด้านบนของ File Explorer และคลิกช่องทำเครื่องหมาย " รายการที่ซ่อน " ในShow / hide File Explorer จะแสดงไฟล์ที่ซ่อนอยู่และจะจดจำการตั้งค่านี้จนกว่าคุณจะเปลี่ยนอีกครั้ง

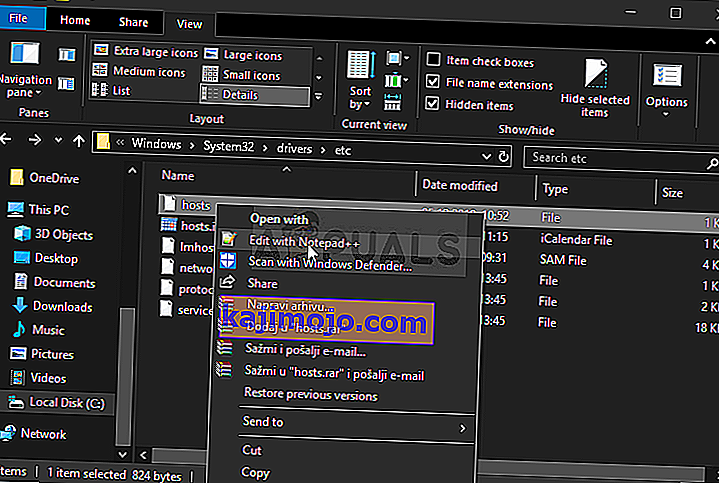
- ค้นหาโฮสต์แฟ้มในEtcโฟลเดอร์คลิกขวาบนและเลือกที่จะเปิดด้วย Notepad ใช้คีย์ผสม Ctrl + Fและตรวจสอบให้แน่ใจว่าคุณได้ป้อน "teamviewer" ในช่องสิ่งที่ค้นหาก่อนที่จะคลิกค้นหาถัดไป
- ค้นหาส่วน TeamViewer ในไฟล์ ควรเริ่มต้นด้วย“ #Teamviewer” และตรวจสอบให้แน่ใจว่าคุณได้เลือกทุกอย่างที่เป็นของมันคลิกขวาที่สิ่งที่เลือกแล้วเลือกปุ่มลบจากเมนูบริบท
- คลิกที่ไฟล์ >> บันทึกเพื่อบันทึกการเปลี่ยนแปลงหรือใช้คีย์ผสม Ctrl + S ออกจาก Notepadและรีสตาร์ทคอมพิวเตอร์ของคุณ ตรวจสอบเพื่อดูว่าปัญหายังคงมีอยู่เกี่ยวกับ TeamViewer“ ไม่พร้อมหรือไม่ ตรวจสอบการเชื่อมต่อ” ข้อความแสดงข้อผิดพลาด!
โซลูชันที่ 2: เปลี่ยนที่อยู่ DNS ของคุณ
ผู้ใช้บอกว่าพวกเขาสามารถแก้ไขปัญหาได้เพียงแค่เปลี่ยน DNS ที่ ISP ของคุณ (ผู้ให้บริการอินเทอร์เน็ต) ของคุณให้มาและเริ่มใช้อันอื่น อาจเป็น DNS ของคอมพิวเตอร์ที่ปัญหาไม่ปรากฏขึ้น แต่ผู้ใช้หลายคนใช้ DNS ของ Google เพื่อแก้ไขปัญหา ทำตามขั้นตอนด้านล่างเพื่อเปลี่ยนที่อยู่ DNS บนคอมพิวเตอร์ของคุณ!
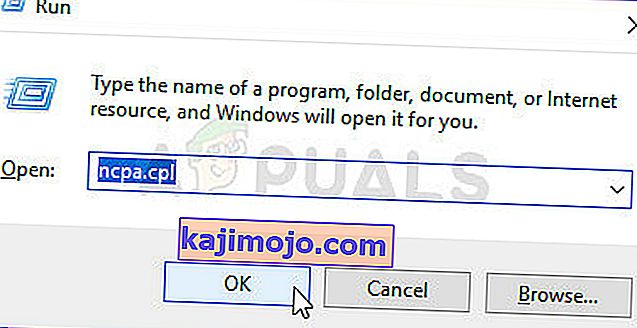
- ใช้ปุ่มรวมของ Windows + Rซึ่งควรเปิดเรียกใช้กล่องยูทิลิตี้ที่คุณควรพิมพ์ ' ncpa.cpl ' ในกล่องข้อความและคลิกตกลงเพื่อเปิดการเชื่อมต่ออินเทอร์เน็ตการตั้งค่ารายการในแผงควบคุม
- สิ่งเดียวที่สามารถทำได้ง่ายๆโดยการเปิดด้วยตนเองแผงควบคุม สลับตัวเลือกดูตามที่ส่วนบนขวาของหน้าต่างเป็นหมวดหมู่และคลิกที่เครือข่ายและอินเทอร์เน็ตที่ด้านบน คลิกปุ่มNetwork and Sharing Centerเพื่อเปิดก่อนที่จะจัดการค้นหาปุ่มChange adapter settingsที่เมนูด้านซ้ายแล้วคลิกที่ปุ่ม
- เมื่อหน้าจอการเชื่อมต่ออินเทอร์เน็ตเปิดขึ้นโดยใช้วิธีการใด ๆ ข้างต้นให้ดับเบิลคลิกที่อะแดปเตอร์เครือข่ายที่ใช้งานอยู่ (อันที่คุณใช้เชื่อมต่ออินเทอร์เน็ต) และคลิกที่ปุ่มคุณสมบัติด้านล่างหากคุณมีสิทธิ์ระดับผู้ดูแลระบบสำหรับบัญชีผู้ใช้ปัจจุบัน
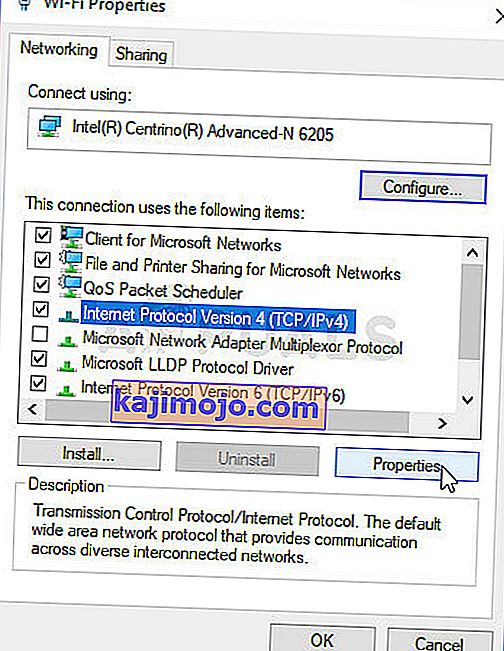
- ค้นหารายการInternet Protocol Version 4 (TCP / IPv4)ในรายการ คลิกเพื่อเลือกและคลิกปุ่มคุณสมบัติด้านล่าง
- อยู่ในแท็บทั่วไปและเปลี่ยนปุ่มตัวเลือกในหน้าต่างคุณสมบัติเป็น“ ใช้ที่อยู่เซิร์ฟเวอร์ DNS ต่อไปนี้ ” หากถูกตั้งค่าเป็นตัวเลือกอื่น
- ไม่ว่าจะด้วยวิธีใดให้ตั้งค่าเซิร์ฟเวอร์ DNS ที่ต้องการเป็น 8.8.8.8 และเซิร์ฟเวอร์ DNS สำรองเป็น 8.8.4.4
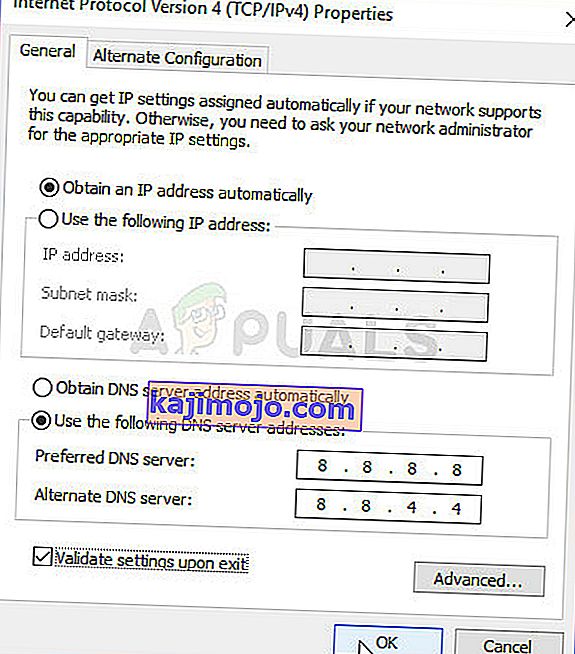
- ให้เลือกตัวเลือก" ตรวจสอบการตั้งค่าเมื่อออก " และคลิกตกลงเพื่อใช้การเปลี่ยนแปลงทันที ตรวจสอบดูว่า TeamViewer“ ไม่พร้อมหรือไม่ ตรวจสอบการเชื่อมต่อของคุณ” ข้อความแสดงข้อผิดพลาดยังคงปรากฏบนคอมพิวเตอร์ของคุณ!


โซลูชันที่ 3: รีเซ็ต Winsock
“ netsh Winsock reset ” เป็นคำสั่งที่มีประโยชน์ซึ่งคุณสามารถใช้ใน Command Prompt เพื่อรีเซ็ต Winsock Catalog กลับสู่การตั้งค่าเริ่มต้นหรือสถานะใหม่ทั้งหมด คุณสามารถลองใช้วิธีนี้ได้หากคุณประสบปัญหาไม่สามารถเชื่อมต่อใน TeamViewer ได้
- ค้นหา“ Command Prompt ” โดยพิมพ์ลงในเมนู Start หรือกดปุ่มค้นหาที่อยู่ข้างๆ คลิกขวาที่รายการแรกซึ่งจะปรากฏขึ้นเป็นผลการค้นหาและเลือกรายการเมนูบริบท“ Run as administrator ”
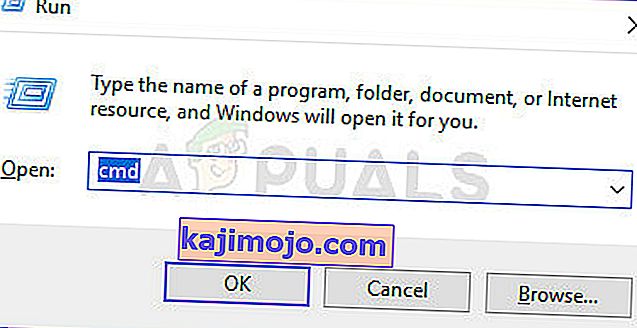
- นอกจากนี้คุณยังสามารถใช้ชุดคีย์โลโก้ Windows + Rเพื่อเปิดกล่องโต้ตอบเรียกใช้ พิมพ์“ cmd” ในกล่องโต้ตอบที่ปรากฏขึ้นและใช้คีย์ผสมCtrl + Shift + Enterเพื่อเรียกใช้ Command Prompt โดยใช้สิทธิ์ของผู้ดูแลระบบ
- พิมพ์คำสั่งต่อไปนี้ในหน้าต่างและตรวจสอบให้แน่ใจว่าคุณกด Enter หลังจากพิมพ์แต่ละคำสั่ง รอให้ข้อความ“ การรีเซ็ต Winsock เสร็จสมบูรณ์ ” หรือสิ่งที่คล้ายกันเพื่อให้ทราบว่าวิธีนี้ใช้ได้ผลและคุณไม่ได้ทำผิดพลาดขณะพิมพ์ ตรวจสอบเพื่อดูว่าปัญหายังคงมีอยู่หรือไม่

netsh winsock รีเซ็ต netsh int ip รีเซ็ต

แนวทางที่ 4: อย่าใช้อินเทอร์เฟซผู้ใช้ใหม่
อินเทอร์เฟซผู้ใช้ไม่ควรเชื่อมต่อกับการเชื่อมต่ออินเทอร์เน็ตของ TeamViewer แต่น่าแปลกที่ผู้ใช้หลายคนรายงานว่าพวกเขาสามารถแก้ไขปัญหานี้ได้โดยการเปลี่ยนกลับไปใช้การออกแบบเก่าของโปรแกรม ซึ่งสามารถทำได้ในการตั้งค่าของ TeamViewer ดังนั้นโปรดทำตามขั้นตอนด้านล่างและพยายามแก้ไขปัญหาการเชื่อมต่อนี้
- เปิดTeamViewerโดยดับเบิลคลิกที่ไอคอนจากเดสก์ท็อปหรือค้นหาหลังจากเปิดเมนู Start แล้วคลิกซ้ายที่ผลลัพธ์ด้านบน
- จากหน้าจอหลักคลิกปุ่มพิเศษจากแถบเมนูและเลือกรายการตัวเลือกจากรายการที่จะปรากฏขึ้น
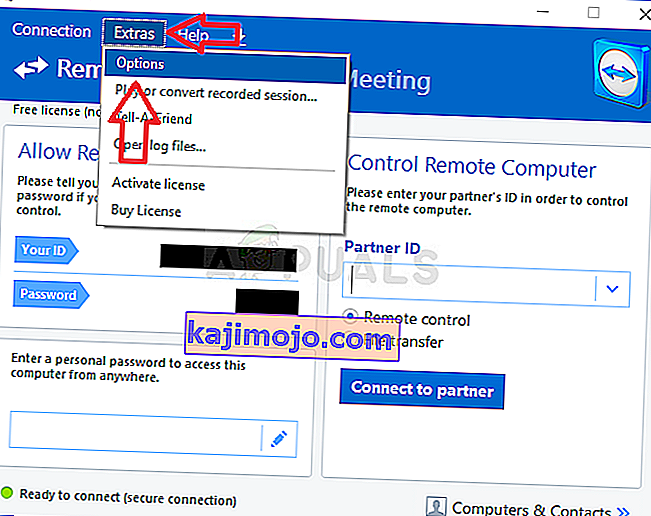
- ไปที่แท็บขั้นสูงในตัวเลือก TeamViewer จากเมนูการนำทางด้านซ้ายและเลือกภายใต้การตั้งค่าขั้นสูงทั่วไปสำหรับตัวเลือก“ ใช้ส่วนต่อประสานผู้ใช้ใหม่ ” ตรวจสอบให้แน่ใจว่าคุณได้ยกเลิกการทำเครื่องหมายในช่องข้าง ๆ ก่อนที่จะยืนยันการเปลี่ยนแปลงที่คุณทำ

- เปิด TeamViewer อีกครั้งและตรวจสอบว่า TeamViewer“ ไม่พร้อมหรือไม่ ตรวจสอบการเชื่อมต่อของคุณ” ข้อความแสดงข้อผิดพลาดยังคงปรากฏบนคอมพิวเตอร์ของคุณ!


โซลูชันที่ 5: เพิ่มข้อยกเว้นสำหรับไฟล์ Teamviewer_Service.exe
บางครั้งเครื่องมือป้องกันไวรัสไม่สามารถรับรู้ถึงความพยายามของโปรแกรมในการเชื่อมต่ออินเทอร์เน็ตว่าไม่เป็นอันตรายและคุณลักษณะของ TeamViewer มักถูกบล็อกโดยโปรแกรมนี้ ในการพิสูจน์ให้โปรแกรมป้องกันไวรัสเห็นว่าโปรแกรมนั้นไม่เป็นอันตรายคุณจะต้องเพิ่มมันลงในรายการข้อยกเว้น / การยกเว้น!
- Open the antivirus user interface by double-clicking on its icon at the system tray (right part of the taskbar at the bottom of the window) or by searching for it in the Start menu.
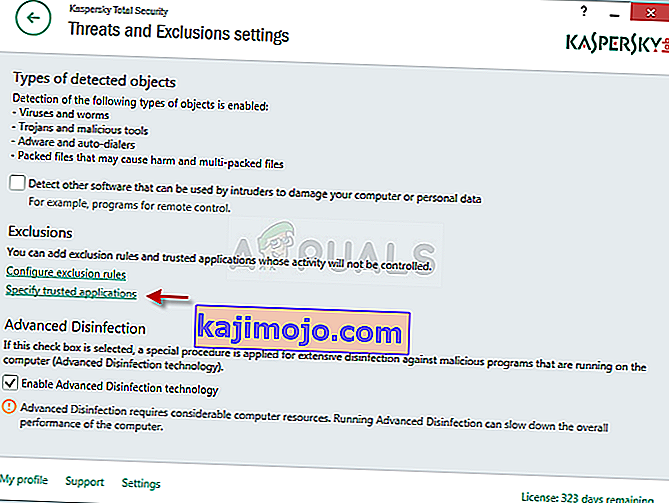
- The Exceptions or Exclusions setting is located in different spots concerning different antivirus tools. It can often be found simply without much hassle but here are some quick guides on how to find it in the most popular antivirus tools:
Kaspersky Internet Security: Home >> Settings >> Additional >> Threats and Exclusions >> Exclusions >> Specify Trusted Applications >> Add.
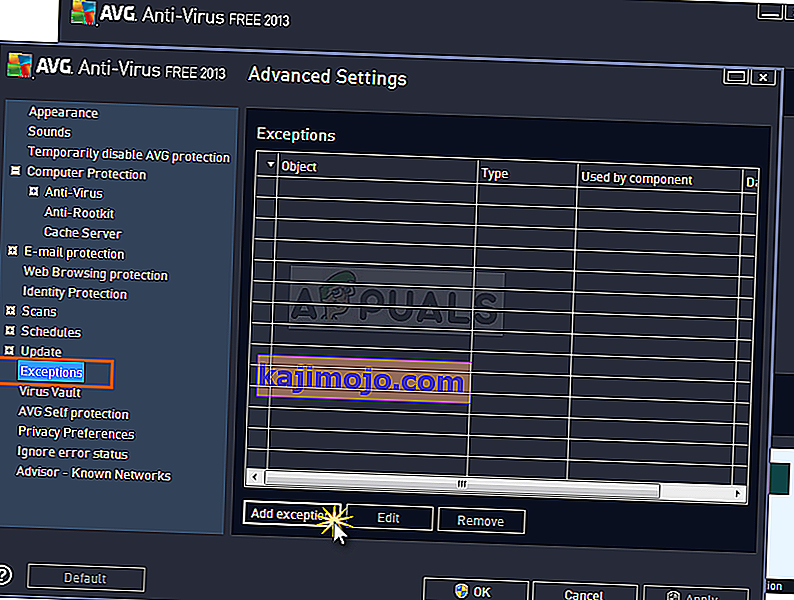
AVG: Home >> Settings >> Components >> Web Shield >> Exceptions.
Avast : Home >> Settings >> General >> Exclusions
- You will need to add the Teamviewer_Service.exe executable in the box which will appear prompting you to navigate to the folder. It should be in the same folder where you decided to install TeamViewer in. By default, it’s:
C:\Program Files (x86)\TeamViewer
- Check to see if you are now able to use TeamViewer without receiving the problematic error message. If it still won’t work, try restarting your computer and try again. The last step would be to uninstall the antivirus and try a different one if the problem persists.


Solution 6: Allow it in Windows Defender Firewall
For TeamViewer’s features to work properly, the app needs to have uninterrupted access to the Internet and its servers to work properly. Windows Defender Firewall is often to blame in such cases and we recommend you make an exception for the Teamviewer_Service.exe executable inside the Windows Defender Firewall!
- Open up Control Panel by searching for the utility in the Start button or by clicking the Search button or the Cortana button at the left part of your taskbar (bottom left part of your screen).
- After Control Panel opens, change the view to Large or Small icons and navigate to the bottom to open the Windows Defender Firewall option.
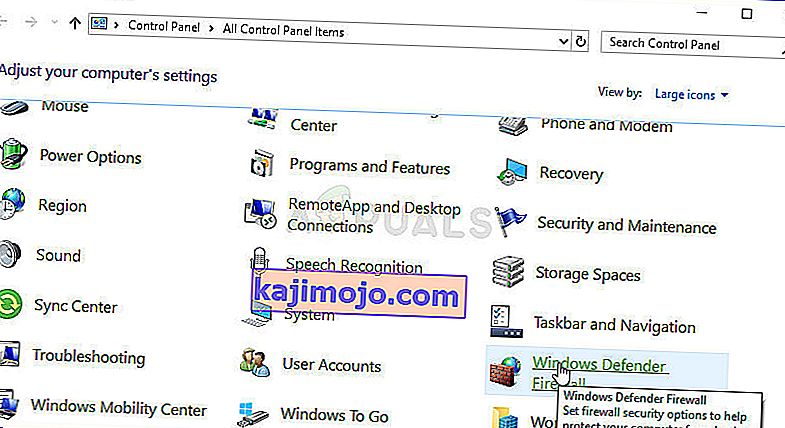
- Click on Windows Defender Firewall and click on the Allow an app or feature through Windows Firewall option from the left side list of options. A list of installed apps should open. Click the Change settings button at the top of the screen and provide administrator permissions. Try locating the executable inside. If it’s not there, click the Allow another app button below.

- Navigate to where you installed TeamViewer (C:\Program Files (x86)\TeamViewer by default) and choose the Teamviewer_Service.exe file.
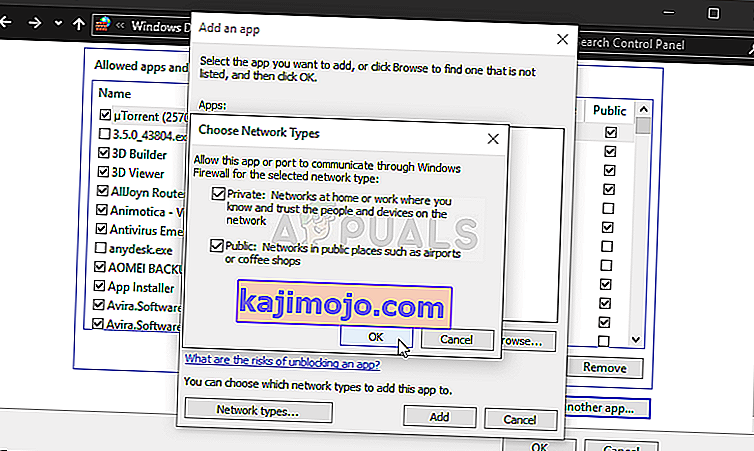
- After locating it, click the Network types button at the top and make sure you check the boxes next to both Private and Public entries before clicking OK >> Add.
- Click OK and restart your computer before checking whether the TeamViewer “Not ready. Check your connection” error message still appears on your computer.


Solution 7: Disable IPv6
Disabling Internet Protocol version 6 connectivity on your computer managed to resolve the problem for many users and it’s an easy way to resolve the problem. This makes this method worthy and you shouldn’t skip it during your troubleshooting process.
- Use the Windows + R key combo which should immediately open the Run dialog box where you should type ‘ncpa.cpl’ in the bar and click OK to open the Internet Connection settings item in Control Panel.
- The same process can also be done by manually opening the Control Panel. Switch the View by setting at the top right section of the window to Category and click on Network and Internet at the top. Click the Network and Sharing center button to open it. Try to locate the Change adapter settings button at the left menu and click on it.
- When the Internet Connection window opens, double-click on your active Network Adapter.
- Then click Properties and locate the Internet Protocol Version 6 entry on the list. Disable the checkbox next to this entry and click OK. Restart your computer to confirm the changes and check to see if the problem persists.


Solution 8: Restart the TeamViewer Service
Stopping the TeamViewer service from running will effectively restart the whole process and many users have reported that it only took them a few minutes to get TeamViewer to work again. Before starting, make sure you have closed TeamViewer completely.
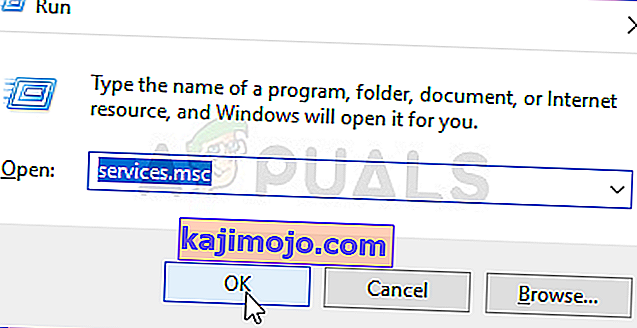
- Open the Run utility by using the Windows Key + R key combination on your keyboard (press these keys at the same time. Type “services.msc” in the newly opened box without the quotation marks and click OK to open the Services tool.
- The alternative way is to open the Control Panel by locating it in the Start menu. You can also search for it using the Start menu’s search button.
- After the Control Panel window opens, change the “View by” option at the top right part of the window to “Large Icons” and scroll down until you locate the Administrative Tools entry. Click on it and locate the Services shortcut at the bottom. Click on it to open it as well.
- Locate the TeamViewer Service on the list, right-click on it and select Properties from the context menu which appears.
- If the service is started (you can check that just next to the Service status message), you should stop it for now by clicking the Stop button in the middle of the window. If it is stopped, leave it stopped until we proceed.
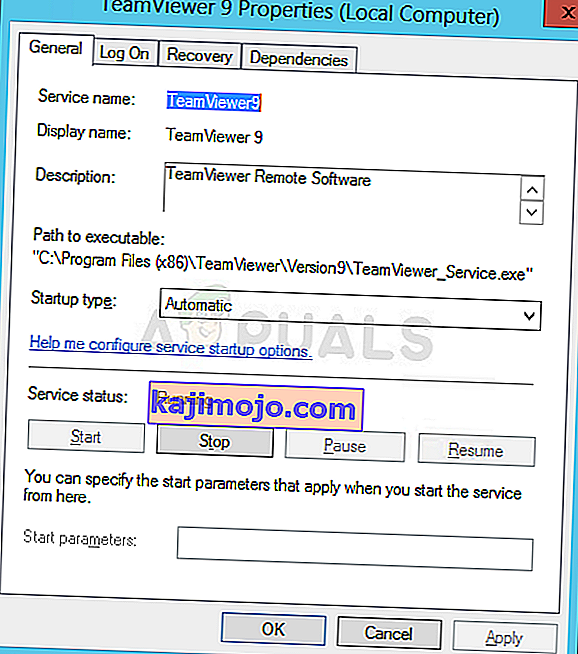
- Make sure that the option under the Startup type menu in the service’s properties window is set to Automatic before you proceed with other steps. Confirm any dialogue boxes which may appear when changing the startup type. Click on the Start button in the middle of the window before exiting.


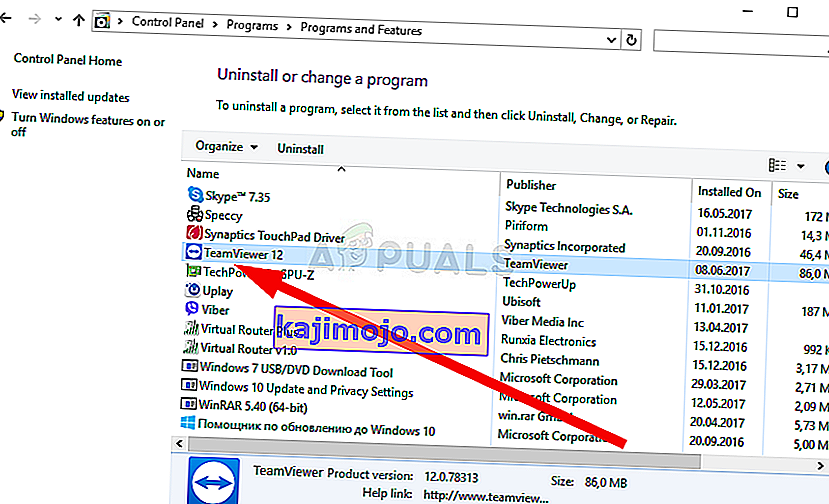
Solution 9: Reinstall TeamViewer
If all methods above fail to work, reinstalling TeamViewer is the last method which can help you resolve the problem on your computer. It should be fast and painless if you follow all the steps properly! You will also install the latest version which contains the patch to the specific issue you are having!
- Click the Start menu and open Control Panel by searching for it simply by typing with the Start menu window open. Alternatively, you can click the cog icon in the lower-left part of the Start menu to open the Settings app if you are using Windows 10.

- In Control Panel, select the View as: Category option at the top right corner of the Control Panel window and click on Uninstall a Program under the Programs section.
- If you are using the Settings app, clicking on Apps should immediately open a list of all installed programs on your PC so wait for a while for it to load
- Locate TeamViewer in Control Panel or Settings and click on Uninstall/Repair. Follow any instructions which appear afterward to uninstall it completely.
- Download the latest version of TeamViewer by visiting this link. Download its setup file, run it from the Downloads folder, follow the instructions on screen, and check to see if the problem persists after reinstalling TeamViewer!

