“ กำลังสร้างการเชื่อมต่อที่ปลอดภัย ” คือข้อความที่ปรากฏที่มุมล่างซ้ายของหน้าต่างเบราว์เซอร์ Google Chrome หลังจากที่คุณพยายามเข้าชมเว็บไซต์ จะปรากฏขึ้นเมื่อเยี่ยมชมเว็บไซต์ที่ใช้โปรโตคอล HTTPS การเยี่ยมชมเว็บไซต์ดังกล่าวหมายความว่าจำเป็นต้องสร้างการเชื่อมต่อที่ปลอดภัยและเข้ารหัส

อย่างไรก็ตามผู้ใช้ Google Chrome อ้างว่าการเชื่อมต่อนี้ใช้เวลานานเกินไปในการสร้างบนเว็บไซต์ทั้งหมดโดยเฉพาะเมื่อเทียบกับเบราว์เซอร์ Edge หรือ Firefox มีวิธีการที่แตกต่างกันหลายวิธีที่ผู้คนใช้ในการแก้ไขปัญหานี้ให้สำเร็จและเราตัดสินใจที่จะระบุไว้ในบทความนี้ ตรวจสอบได้ด้านล่าง!
อะไรทำให้เกิดปัญหาการเชื่อมต่อที่ปลอดภัยช้าใน Google Chrome
มีสาเหตุที่แตกต่างกันเล็กน้อยสำหรับปัญหานี้และคุณควรตรวจสอบรายการด้านล่างเพื่อระบุสาเหตุที่ถูกต้องสำหรับสถานการณ์ของคุณอย่างถูกต้อง วิธีนี้จะ จำกัด วิธีการแก้ไขปัญหาที่คุณใช้ได้! ลองดูด้านล่าง!
- บริการเข้ารหัสทำงานผิดปกติ - บริการนี้รับผิดชอบในการแก้ไขปัญหาการจับมือ TLS ซึ่งใช้เพื่อสร้างการเชื่อมต่อที่ปลอดภัยระหว่างไคลเอนต์และเซิร์ฟเวอร์ การเริ่มบริการนี้ใหม่ควรแก้ไขปัญหาได้
- ส่วนเสริมที่น่าสงสัย - หากคุณได้เพิ่มส่วนขยายและปลั๊กอินใหม่ลงในเบราว์เซอร์ Chrome หนึ่งในนั้นอาจทำให้เกิดปัญหาการเชื่อมต่อและยืดเวลาที่จำเป็นในการสร้างการเชื่อมต่อที่ปลอดภัย ลองลบออกจาก Google Chrome
- การตรวจสอบการป้องกันไวรัส - ชุดโปรแกรมป้องกันไวรัสส่วนใหญ่มีคุณสมบัติการสแกน HTTP ซึ่งจะสแกนการเชื่อมต่อที่คุณพยายามสร้าง จะยืดเวลาที่ต้องใช้ในการเชื่อมต่อและคุณควรพิจารณาปิดการใช้งานเพื่อเร่งความเร็ว
- TLS 1.3 - หากคุณกำลังใช้ TLS 1.3 ในเบราว์เซอร์ Google Chrome ของคุณเว็บไซต์บางแห่งอาจเข้ากันไม่ได้ดังนั้นให้พิจารณาปิดการใช้งานในขณะนี้
โซลูชันที่ 1: ใช้ชุดคำสั่งต่อไปนี้
วิธีนี้ค่อนข้างเป็นที่นิยมเนื่องจากความเรียบง่ายและผู้คนจำนวนมากใช้วิธีนี้เพื่อแก้ไขปัญหาส่วนใหญ่ที่เกี่ยวข้องกับปัญหาที่เกิดขึ้น สิ่งที่ตลกคือมันใช้งานได้และผู้ใช้แสดงความคิดเห็นว่านี่เป็นขั้นตอนเดียวที่ใช้ในการแก้ไขปัญหา ลองใช้เลยโดยดูโซลูชัน 2จากบทความFix: Err_Connection_Closed ตรวจสอบให้แน่ใจว่าคุณทำตามขั้นตอนชุดแรกเท่านั้นด้วยคำสั่งใน Command Prompt!
ลองเปิด Google Chrome และตรวจสอบว่า“ การสร้างข้อความการเชื่อมต่อที่ปลอดภัย” ยังค้างอยู่นานเกินไปหรือไม่
โซลูชันที่ 2: ทำการรีเซ็ตเครือข่าย
การรีเซ็ตเครือข่ายเป็นอีกวิธีง่ายๆในการแก้ไขปัญหานี้ มันได้ผลสำหรับผู้ใช้จำนวนมากและคุณไม่มีอะไรจะใช้ถ้าคุณลองใช้ ทำตามขั้นตอนด้านล่างและตรวจสอบว่าข้อความ "กำลังสร้างการเชื่อมต่อที่ปลอดภัย" ยังคงใช้เวลานานเกินไปกว่าจะหายไปเมื่อเข้าชมเว็บไซต์ใน Google Chrome!
- เปิดยูทิลิตี้Runโดยใช้คีย์ผสมของWindows + Rบนแป้นพิมพ์ของคุณ (กดปุ่มเหล่านี้พร้อมกันพิมพ์“ ms-settings: ” ในช่องที่เพิ่งเปิดโดยไม่มีเครื่องหมายคำพูดแล้วคลิกตกลงเพื่อเปิดเครื่องมือการตั้งค่า
- อีกวิธีหนึ่งคือการเปิดเครื่องมือการตั้งค่าบนพีซีของคุณโดยคลิกที่เมนูเริ่มแล้วคลิกไอคอนฟันเฟืองที่ส่วนล่างซ้าย

- นอกจากนี้คุณสามารถใช้คีย์ผสมของWindows + Iเพื่อให้ได้ผลเช่นเดียวกัน คลิกเพื่อเปิดส่วนเครือข่ายและอินเทอร์เน็ตและอยู่ในแท็บสถานะทางด้านซ้ายของหน้าต่าง
- เลื่อนลงไปจนสุดปุ่มรีเซ็ตเครือข่ายสีน้ำเงิน คลิกและทำตามคำแนะนำที่จะปรากฏบนหน้าจอและตรวจสอบให้แน่ใจว่าคุณปฏิบัติตามทุกอย่าง
- ตรวจสอบดูว่าปัญหาเดิมยังคงอยู่หรือไม่!


โซลูชันที่ 3: รีสตาร์ทบริการการเข้ารหัสและไคลเอ็นต์ DNS ในบริการ
การแชร์ไฟล์เช่นเดียวกับคุณสมบัติอื่น ๆ ใน Windows 10 ขึ้นอยู่กับบริการบางอย่างเพื่อให้ทำงานได้อย่างถูกต้อง ในกรณีนี้บริการเรียกว่า Function Discovery Provider Host และ Function Discovery Resource Publication บริการเหล่านี้จำเป็นต้องเริ่มต้นและจำเป็นต้องทำงานอย่างต่อเนื่อง ทำตามขั้นตอนด้านล่างเพื่อทำสิ่งนั้นบนคอมพิวเตอร์ของคุณ!
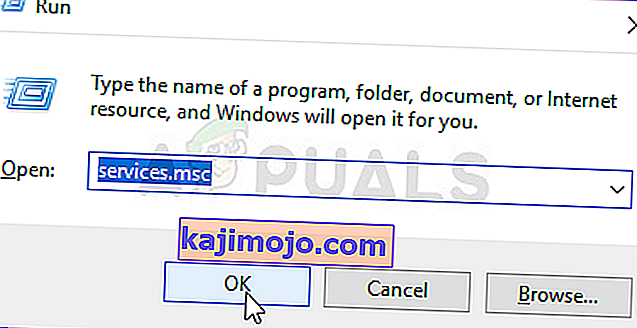
- เปิดยูทิลิตี้Runโดยใช้คีย์ผสมของWindows + Rบนแป้นพิมพ์ของคุณ (กดปุ่มเหล่านี้พร้อมกันพิมพ์“ services.msc ” ในช่องที่เพิ่งเปิดใหม่โดยไม่มีเครื่องหมายอัญประกาศและคลิกตกลงเพื่อเปิดเครื่องมือServices
- วิธีทางเลือกคือการเปิด Control Panel โดยการระบุตำแหน่งในเมนู Start คุณยังสามารถค้นหาโดยใช้ปุ่มค้นหาของเมนูเริ่ม
- หลังจากหน้าต่างแผงควบคุมเปิดขึ้นให้เปลี่ยนตัวเลือก“ ดูตาม ” ที่ด้านขวาบนของหน้าต่างเป็น“ ไอคอนขนาดใหญ่ ” และเลื่อนลงไปจนกว่าคุณจะพบรายการเครื่องมือการดูแลระบบ คลิกที่มันและค้นหาทางลัดบริการที่ด้านล่าง คลิกเพื่อเปิดเช่นกัน
- ค้นหาบริการ Cryptographic ServicesและDNS Clientในรายการคลิกขวาที่แต่ละรายการและเลือกPropertiesจากเมนูบริบทที่ปรากฏขึ้น
- หากบริการเริ่มทำงาน (คุณสามารถตรวจสอบได้ว่าอยู่ถัดจากข้อความสถานะการบริการ) คุณควรหยุดบริการในตอนนี้โดยคลิกที่ปุ่มหยุดตรงกลางหน้าต่าง หากหยุดให้หยุดทิ้งไว้จนกว่าเราจะดำเนินการต่อ

- ตรวจสอบให้แน่ใจว่าตัวเลือกในเมนูประเภทการเริ่มต้นในหน้าต่างคุณสมบัติของบริการถูกตั้งค่าเป็นอัตโนมัติก่อนที่คุณจะดำเนินการขั้นตอนอื่น ๆ ยืนยันกล่องโต้ตอบที่อาจปรากฏขึ้นเมื่อเปลี่ยนประเภทการเริ่มต้น คลิกที่ปุ่มStartตรงกลางหน้าต่างก่อนออก ตรวจสอบให้แน่ใจว่าคุณทำขั้นตอนเดียวกันซ้ำสำหรับบริการทั้งหมดที่เรากล่าวถึง


คุณอาจได้รับข้อความแสดงข้อผิดพลาดต่อไปนี้เมื่อคุณคลิกที่เริ่ม:
Windows ไม่สามารถเริ่มบริการบน Local Computer ข้อผิดพลาด 1079: บัญชีที่ระบุสำหรับบริการนี้แตกต่างจากบัญชีที่ระบุสำหรับบริการอื่น ๆ ที่ทำงานในกระบวนการเดียวกัน
หากสิ่งนี้เกิดขึ้นให้ทำตามคำแนะนำด้านล่างเพื่อแก้ไข
- ทำตามขั้นตอน 1-3 จากคำแนะนำด้านบนเพื่อเปิดหน้าต่างคุณสมบัติของบริการ ไปที่แท็บLog Onและคลิกที่ปุ่มBrowse …
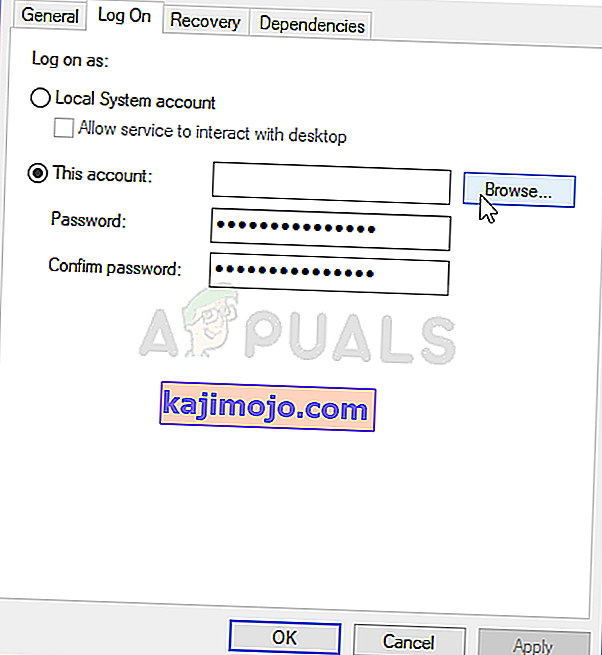
- ภายใต้ช่องรายการ " ป้อนชื่อวัตถุเพื่อเลือก " พิมพ์บริการเครือข่ายคลิกที่ตรวจสอบชื่อและรอให้ชื่อพร้อมใช้งาน
- คลิกตกลงเมื่อคุณดำเนินการเสร็จสิ้นและพิมพ์รหัสผ่านในช่องรหัสผ่านเมื่อคุณได้รับพร้อมท์หากคุณตั้งรหัสผ่าน การแชร์ไฟล์ของ Windows 10 ควรทำงานได้อย่างถูกต้องแล้ว!

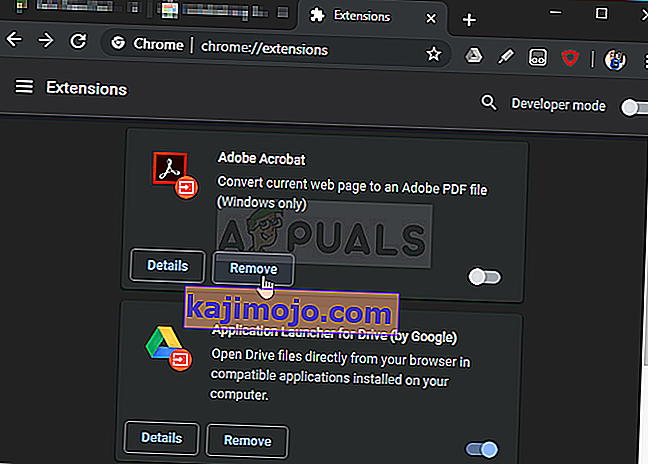
โซลูชันที่ 4: ตรวจสอบส่วนขยายที่น่าสงสัย
หากปัญหาเริ่มเกิดขึ้นเมื่อเร็ว ๆ นี้อาจเป็นเพราะส่วนขยายที่เพิ่มเข้ามาใหม่ซึ่งทำให้เกิดความปลอดภัย คุณสามารถตรวจสอบได้อย่างง่ายดายโดยเปิด Google Chrome ปิดการใช้งานส่วนขยายทีละรายการและตรวจสอบว่าอันไหนเป็นตัวการ ลบทิ้งในภายหลัง!
- เปิดGoogle Chromeโดยดับเบิลคลิกที่ไอคอนจากเดสก์ท็อปหรือค้นหาในเมนูเริ่ม พิมพ์ที่อยู่ด้านล่างในแถบที่อยู่เพื่อเปิดส่วนขยาย :
chrome: // ส่วนขยาย
- ลองค้นหาส่วนขยายที่อาจทำให้เกิดปัญหาด้านความปลอดภัยหรือส่วนขยายที่เพิ่งเพิ่มเข้ามาและคลิกปุ่มลบที่อยู่ถัดจากส่วนขยายเพื่อลบออกจาก Google Chrome อย่างถาวร
- รีสตาร์ท Google Chromeและตรวจสอบว่าคุณยังสังเกตเห็นว่าข้อความ "กำลังสร้างการเชื่อมต่อที่ปลอดภัย" ค้างในคอมพิวเตอร์ของคุณนานเกินไปหรือไม่!

โซลูชันที่ 5: ปิดใช้งานการตรวจสอบ HTTP / พอร์ตบนโปรแกรมป้องกันไวรัสของคุณ
สาเหตุปกติของปัญหาคือโปรแกรมป้องกันไวรัสของคุณสแกนใบรับรองของไซต์โดยไม่จำเป็นซึ่งทำให้กระบวนการขอไฟล์จากเซิร์ฟเวอร์ช้าลงซึ่งอาจทำให้ข้อความ "กำลังสร้างการเชื่อมต่อที่ปลอดภัย" ค้างเป็นเวลานานใน Google Chrome .
Since the error appears to users using different antivirus tools, here is how to locate the HTTP or Port scanning options on some of the most popular third-party AV tools.
- Open the antivirus user interface by double-clicking on its icon at the system tray (right part of the taskbar at the bottom of the window) or by searching for it in the Start menu.
- The HTTPS scanning setting is located in different spots concerning different antivirus tools. It can often be found simply without much hassle but here are some quick guides on how to find it in the most popular antivirus tools:
Kaspersky Internet Security: Home >> Settings >> Additional >> Network >> Encrypted connections scanning >> Do not scan encrypted connections

AVG: Home >> Settings >> Components >> Online Shield >> Enable HTTPS Scanning (uncheck it)

Avast: Home >> Settings >> Components >> Web Shield >> Enable HTTPS Scanning (uncheck it)
ESET: Home >> Tools >> Advanced Setup >> Web and Email >> Enable SSL/TLS protocol filtering (turn it off)
Check to see if you are now able to visit any website without receiving the “Establishing a secure connection” message for a long time! If the error still appears, you might consider using a different antivirus or firewall tool, especially if the one giving you the problems is free!
Solution 6: Disable TLS 1.3
The problem is mostly related to some of the latest version of TLS. Certain developers have discovered that the problem can be resolved easily simply by editing certain advanced Chrome settings which will disable TLS 1.3. TLS is the transport layer protocol which handles encryption and data transfer. Try using an older version. Follow the instructions below to try this method out!
- Open Google Chrome by double-clicking its icon from the Desktop or by searching for it in the Start menu. Type in the address below in the address bar to open Experiments:
chrome://flags
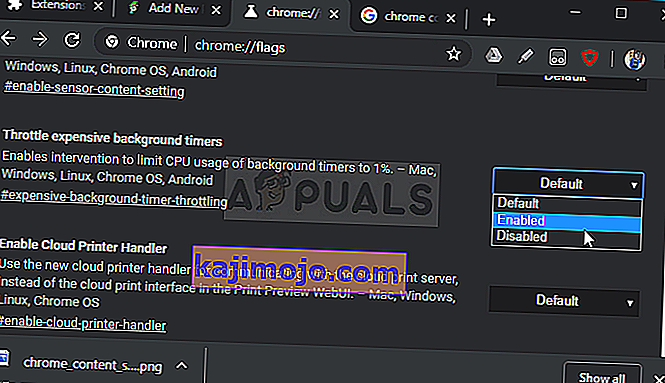
- Locate the option to disable TLS listed below inside the Experiments window, under the Available tab. You can use the search bar at the top of the window to locate it as the list is very long. Make sure you search for TLS, find the related settings, and set it to Disabled.
- Restart Google Chrome and check to see if establishing the connection is still a problem!

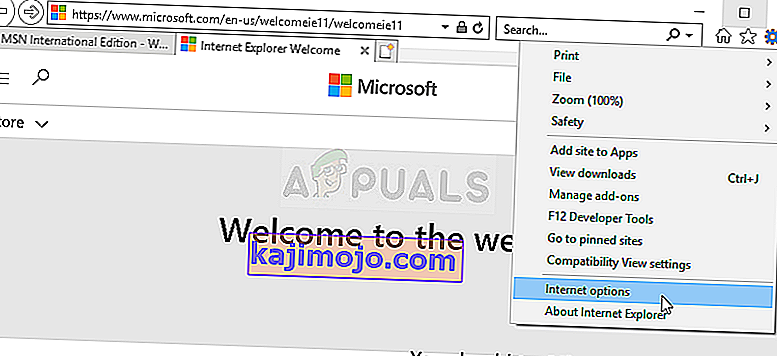
Solution 7: Make Sure Certain Settings are Set in Internet Options
This is one of the easiest methods used to resolve the problem. Proxy servers can cause the login process to fail and you need to disable them inside Internet Options. Make sure you try out the methods above before troubleshooting this problem!
- Open Internet Explorer on your computer by searching for it on the Desktop or the Start menu. Click on the cog icon located in the top right corner. From the menu which opens, click on Internet Options to open a list on related connection settings.
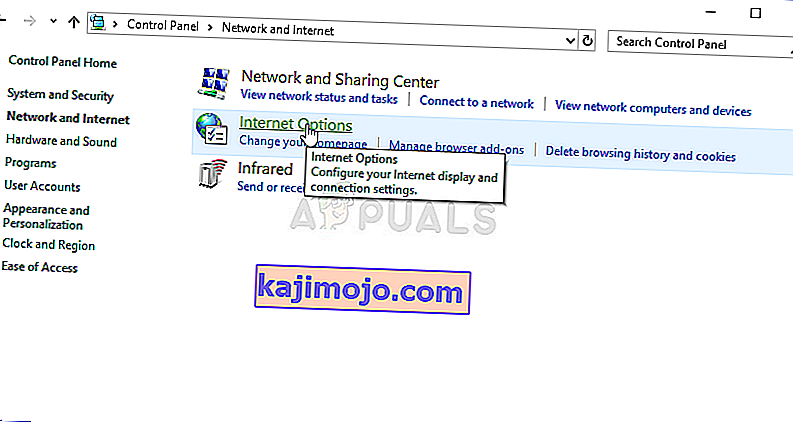
- If you don’t have access to Internet Explorer, Open Control Panel by searching for it in the Start menu or by using the Windows Key + R key combination, typing “control.exe” in the Run box, and click OK to run Control Panel.
- In Control Panel, select to View as: Category at the top right corner and click on the Network and Internet button to open this section. Inside this window, click on Internet Options to navigate to the same screen as you would if you opened Internet Explorer.
- Navigate to the Connections tab and click on LAN Settings. Uncheck the box next to Automatically Detect Settings and make sure the Use a proxy server for your LAN option is unchecked.
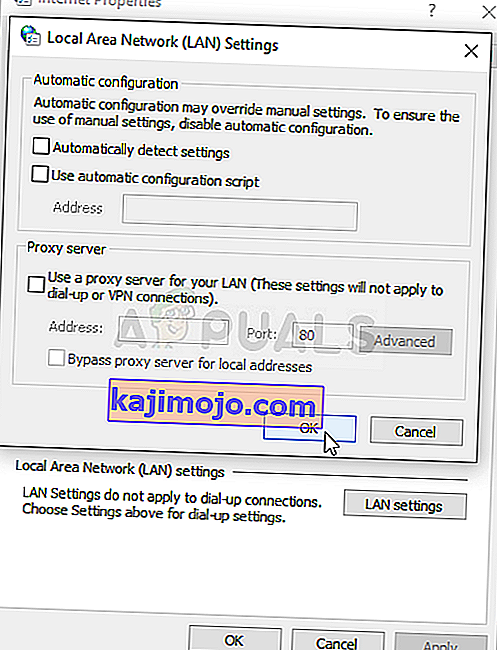
- Make sure you apply the changes you made and restart your computer before you check to see if the Origin won’t go online login error still appears.


Solution 8: Clear Browsing Data
An over-accumulation of browsing data in the form of cookies, browser cache, and history files can slow down a browser’s ability to connect and cause it to use more internet resources than necessary. This can be observed when trying to connect to a secure website. Users have reported that deleting their browsing data was able to help them get rid of the problem!
Make sure you follow the steps from the Solution 3 of our How to Fix Google Chrome High CPU Usage on Windows? article. Restart your computer again and check if the “Establishing secure connection” message keeps appearing!
Solution 9: Group Policy Fix
This is quite an easy way of resolving the problem but, unfortunately, it’s not available to Windows 10 Home users. If you are using Windows 10 Pro or Enterprise, make sure you follow the steps below to try to resolve this problem!
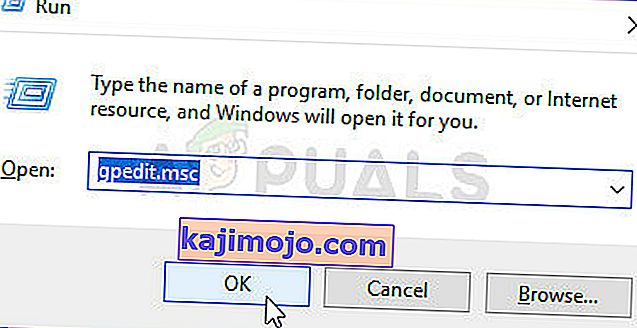
- Use the Windows Key + R key combination (tap the keys simultaneously) to open the Run dialog box. Enter “gpedit.msc” in the Run dialog box, and press the OK button to open the Local Group Policy Editor tool. On Windows 10, you can try simply type Group Policy Editor in the Start menu and click the top result.
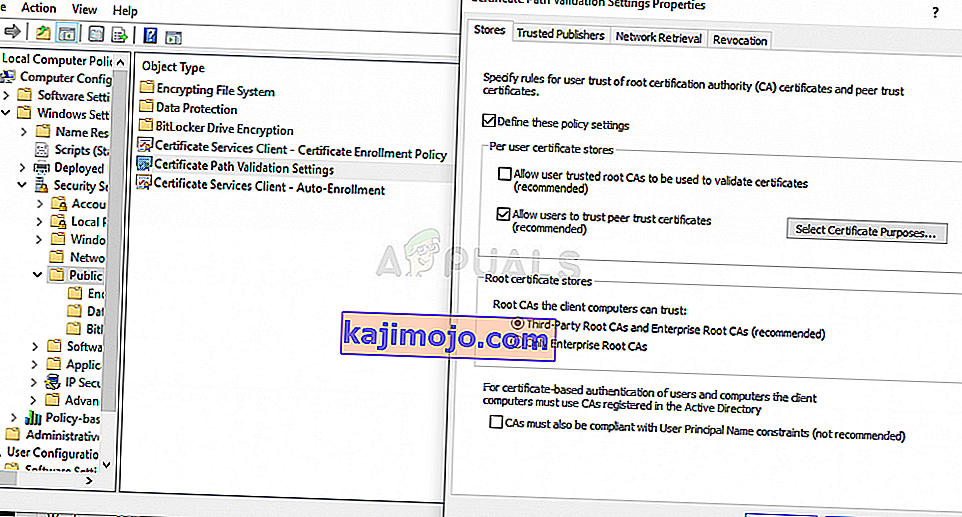
- On the left navigation pane of Local Group Policy Editor, under Computer Configuration, double click on Windows Settings, and navigate to Security Settings >> Public Key Policies.
- Select the Public Key Policies folder by left-clicking on it and check out its right side section.
- Double click on the “Certificate Path Validation Settings” policy and check the radio button next to the “Define Policy Settings” option. Uncheck the box next to the Allow user trusted root CAs to be used to validate certificates (recommended) option.
- Apply the changes you have made before exiting. The changes won’t be applied until you restart.
- Finally, reboot the computer to save the changes and check to see if you are still being targeted with the error.

